Wednesday, October 29, 2008

Biscuits, Texas Style

Friends, our buddy the Homesick Texan makes a mean biscuit! I saw this post a week or two ago and have been dreaming about it since. Fortunately, I didn't botch it up. These little guys were surprisingly easy to make. I always thought making biscuits from scratch was a long and drawn out process, but it's not!


Biscuits:
2 cups of flour
1 tablespoon baking powder
1 teaspoon of sugar (can add more to taste)
1/2 teaspoon of salt1 stick of butter, cold (8 tablespoons)
3/4 cup of buttermilk, cream or half-and-half

Preheat the oven to 450 degrees.
Mix all the dry ingredients together. Cut the stick of butter into pieces, and work into the flour mixture with your hands or a pastry blender until it resembles pea-sized crumbs. Add the liquid, mixing until a bit loose and sticky. Pour dough out on a floured surface, and knead for a minute. Dough should be smooth and no longer wet. You can sprinkle more flour on the surface if you find it’s sticking. Take dough into a ball, and hit it with a rolling pin, turning it and folding it in half every few whacks. Do this for a couple of minutes.Roll out dough until it’s 1/4 of an inch thick, and then fold it in half.Using a round cutter (can use a glass or a cup if don’t have a biscuit cutter) cut out your biscuits from folded dough.Place on a greased baking sheet close together (so they rise up not out), and bake for 15 minutes or until the tops are golden brown.
Makes 10-12 biscuits.

I was kinda nervous about beating the biscuits so I only did it a couple of times. It don't know if beating makes them more dense or what...but they turned out FABULOUS! I expect to makes these a LOT! I am one step away from making biscuits and gravy from scratch for my Sweetie!

Monday, October 27, 2008

All made up!

I was reading For the Love of Cooking and got a hankering for some of Pam's yummy chili. Unfortunately, I didn't have any of the fixin's for red bean, red meat chili. I did however have white beans and chicken so I decided to make something up. I know...you're thinking...uh oh...we all know what happens when Sarah makes things up. But I pulled this one off FAMOUSLY!
White Bean Chicken Chili:
1 breast of chicken
1 serrano, chopped
1/2 white onion, chopped
1/2 red pepper, chopped
1 can crushed tomatoes
1 cup chicken stock
1 garlic clove crushed
1/2 teaspoon oregano
1/2 teaspoon cumin
1/2 teaspoon sage
1 can great northern beans
1 can navy beans

Heat up a frying pan on medium high with a little olive oil in it and brown on both sides until the juices run clear and the chicken is cooked through.If you are thinking when you start cooking, you could cook the chicken up in the heavy bottomed stock pot instead of dirtying another pan. I, however, was not thinking when I started cooking and used a separate pan. Let the chicken sit for a second or two and then chop up into bite sized pieces and set aside.

In your heavy bottomed stock pot with a little olive oil cook up the onions, red onion and serrano until soft.Add the chicken, tomatoes, chicken stock and seasonings, bring to a simmer. Strain and rinse both cans of white beans and add to stock pot. Stir carefully so as not to break up the white beans. They are much softer beans than red beans and break easily. Simmer for 15 minutes until the beans are warmed through.
This was a pretty great creation. Even Alex was impressed. He has had to eat enough of my silly concoctions that he worries a little when I tell him I am winging it. :) We sure are lucky this one was yummy!

Sunday, October 26, 2008

Golden Ticket

O.K., so this post isn't about food per se, but it is about something you consume to compliment your food. I am curious as to the vitamins you all take. I have heard a plethora of things about vitamins from 'they give you tons of energy...you can live off these babies' to 'they make your waste expensive.'

I personally take a multi-vitamin and calcium. I don't really drink milk except to put soy milk in my morning cereal and iced latte's when I have them. However, a while back a co-worker told me that regular calcium pills don't break down in your stomach fast enough for your body to make use of the calcium. He is in the boat that vitamins make 'expensive waste.' He had me cutting my freaking calcium tablets in half for a while because I had bought a monster sized bottle of calcium at Costco.
I have been searching out alternatives to my Costco Calcium and got turned on to Viactin...those chocolate chews. They were pretty decent but went hard WAY fast. I found a GREAT alternative at Wild Oats...Whole Foods...I liked Wild Oats better. Their stores smelled like lavender and eucalyptus and Whole Foods stores smell like health food...but I digress. Nutrition Now has a product called, 'Calcium Soft Chews'. Kind of a lame name, but a GREAT product.
The 'Chews' come in individually wrapped golden packages that make you think you have won the golden ticket from Willy Wonka! The Chew its self is nice and soft. 500 mg of Calcium is what you need each day and each 'Chew' is 250 mg...so it gives you the opportunity to drink a glass of milk or eat some cheese and truly supplement your diet with a 'Calcium Chew'. The best part is that it gives you a great excuse to eat chocolate. Alex thinks that's why I get this particular brand of calcium...and he is probably right. I need strong bones so I don't get osteoporosis.

Tell me what vitamins you take to supplement your yummy blogs! I am curious to see how many pill cutters their are out there.

Saturday, October 25, 2008

Love from Zesty!

The Premio Arte Pico was bestowed upon me by by blogging buddy ZESTY! His name is Cory, but he is my ZESTY COOK! You have to check his blog out because it ROCKS!...and I'm not just saying that because he gave me an award!

This award originates in Uruguay and is called the Premio Arte Pico from a blogger who makes dolls. You can visit her site here.
The rules of the Premio Arte Pico:
1) Pick 5 blogs that you consider deserve this award, creativity, design, interesting material, and also contributes to the blogger community, no matter of language.

2) Advertise name of the author and also a link to his or her blog to be visited by everyone.

3) Each award-winner, has to show the award and put the name and link to the blog that has given her or him the award itself.

4) Award-winner and the one who has given the prize have to show the link of “Arte y pico” blog, so everyone will know the origin of this award.

5) Share these rules.

I am passing this award onto the following:

Project Domestication: If you want cupcakes...check out this blog. She makes cupcakes, she reviews cupcakes and finds SWEET decorations for cupcakes. Maybe it is because she is from Utah too or because she frequents Williams Sonoma as much as I do...but I dig her blog!

Tracey's Culinary Adventures: Tracey had me at her Guinness Milk Chocolate Ice Cream . You got to love a blog that mixes our favorite Irish Beer with chocolate and cream. Great blog, Tracey.

Chocolate Shavings: I have a tendency to make things I perceive as 'safe'. Chocolate Shaving's has opened my mind to what 'safe' really is. Bacon wrapped scallops, pea puree in risotto, salmon tartare... I would normally pass over these dishes in a cookbook...but I want to try them after seeing them at Chocolate Shavings!

Sweet Sensations: Talk about good energy. You enter this blog and the background cheers you up. Then you start reading the recipes and start drooling. You gotta support the military wives! (I'm one too!)

Life, Lightly Salted: Self described"...lightly salted and slightly jaded... an aging punk rock princess" has a fun, dark blog with GREAT food! She has a signature dish called, 'Death by Garlic'...this recipe is how I would take my life with food. :) She is also doing her first giveaway...check it out.

Thursday, October 23, 2008

Light but SPICY!

After a week of Mexican food, I opted for something light tonight. When I want something light but with tons of flavor, I turn to Ellie Krieger. That chick know how to stay skinny and still eat food that tastes good. I bought her 'The Food You Crave' book off The Good Cook.com. Bare with me while I plug this web site. I don't remember how I heard about this site, but I scored 3 FREE cookbooks when I signed up and I was only obligated to buy two others at 'club' price. I know...businesses like this are shifty...they mail you books when y0u forget to mail in those silly cards. But The Good Cook allows you to decline online. They also hook you up with 50% off books all the time too. O.K., I'm done plugging...but check it out.

I loved this book so much, I bought one for my mother and mother-in-law for Mother's Day last year. What is the best way to show the mother's in your life that you love them? Give them books that will keep them healthy so they stick around for a long time.

Enough with the book already! Tonight I made Ellie's recipe for Savory Chinese Chicken Salad. This is the BEST and I mean ABSOLUTE BEST asian chicken salad I have ever eaten. The dressing makes the whole thing!

Adapted from Ellie Krieger's
Savory Chinese Chicken Salad:

1/4 cup sliced almonds

For the chicken:
1 tablespoon low-sodium soy sauce
1/2 teaspoon toasted sesame oil
1 pound boneless, skinless chicken breast halves
For the salad:
1 bag shredded cabbage
1 bag romaine lettuce
3 scallions (white and green parts), thinly sliced
1-11 oz can mandarin oranges
For the dressing:
1/3 cup rice vinegar
3 tablespoons low-sodium soy sauce
2 tablespoons vegetable oil
2 tablespoons firmly packed brown sugar
1 1/2 teaspoons chili sauce, such as Sriracha
1 1/2 teaspoons toasted sesame oil
1 clove garlic, minced
1 teaspoon ginger...I didn't have fresh ginger so I used powdered.
Alex and I put the soy sauce and toasted sesame oil in a plastic bag with the chicken and let it marinade for about 10 minutes. Alex grilled it up...it was VERY proud of the grill marks he achieved.While the chicken was cooking up I mixed up the dressing. Throw all the ingredients into a bowl and mix until the brown sugar is completely dissolved. The dressing is runny like a vinaigrette...which is one of the things I love about this dressing...it isn't sticky sweet like some of the dressing you get in restaurants. This recipe meets ALL my needs. Because of the Sriracha it gives a nice KICK of spicy heat to the dish. How many dressing do you know that are spicy?! I love it!Mix up the amount of greens you want in a salad bowl and top with the cooked chopped up chicken, mandarin oranges, scallions and almonds. The last time Alex and I made this recipe we didn't have almonds and substituted cashews...anything you like. The sky is the limit!
I hope you love this recipe as much as Alex and I do!

Wednesday, October 22, 2008

Did you guess CARNITAS?

I have been wanting to make Carnitas for a long time...we are talking YEARS...but I have been too afraid to make them...until NOW!

I searched high and low for an easy recipe for carnitas because that was part of what dissuaded me all these years. All the recipes I had seen called for cooking all freaking day long and I am not that patient...even if it means pure melt in your mouth taste. While searching, I found a recipe that caught my eye from the Homesick Texan, but it required minimum cooking for 4-5 hours. The next recipe I found had a footnote saying to use a pressure cooker to reduce cook time to 35 minutes! I HAVE A PRESSURE COOKER! And from my pulled pork sandwiches and red beans and rice, you know I'm not afraid to use it.

Alex and I bought a 5 pound pork shoulder...well, pork butt...but it really is a shoulder. I learned from Mike Rowe on Dirty Jobs that a pork shoulder is referred to as the butt, and the actual butt of a pig is a ham. Butt, back to the pork shoulder. :) Because it was just the two of us, I cut the shoulder in half and froze the left over meat. This cut of meat has a lot of fat on it. You should try to trim back as much as you can...but not all of it. There is a LOT of flavor in that fat!

Carnitas (adapted from Diana Kennedy) - from the Homesick Texan blog.
3 pounds of pork butt
1 cup of orange juice
3 cups of water
2 teaspoons of salt

Like I said...pretty simple. The only part of the recipe I followed after the ingredients was to cut the pork into strips, well 3 inches chunks and salted and peppered the crap out of it. I then seared the cubed pork until each side was nicely browned in the pressure cooker. I emptied the pork into a separate dish so I could put the metal part into the bottom of the pressure cooker. The metal piece has holes in it to keep the meat (or whatever you are cooking in it) from touching the bottom of the pan. I suspect because you keep the heat on close to high or medium high the whole time it is cooking. I put the pork back in with the orange juice and water...I also added two chicken bullion cubes for my entertainment. :) I sealed the pressure cooker and cooked it for 35 minutes at the first line. My pressure cooker has two lines to indicate how much pressure there is in the pan. I had to release a little bit of pressure a couple of times while it was cooking so it maintained the pressure at the first line.
You can't tell very well from this picture, but the pork was shredding just by touching it with the tongs.Homesick Texans Directions:

1. Cut pork into strips (three inches by one inch), bring to a boil and then simmer uncovered on low for 2 hours. Do not touch the meat.2. After two hours, turn heat up to medium high, and continue to cook until all the liquid has evaporated and the pork fat has rendered (about 45 minutes). Stir a few times, to keep pork from sticking to bottom of pan.3. When pork has browned on both sides, it’s ready (there will be liquid fat in the pan). Serve either cubed or shredded (pork will be tender enough that just touching it will cause it to fall apart).Goes very well with a green salsas such as Ninfa's green sauce or this tomatillo salsa or this salsa verde with avocados and tomatillos.Serves 4-6

I dig the fact that the Homesick Texan included the suggestion for salsa verde, but again, I am not patient enough to make salsa when I am making a meal like carnitas...even if it is in the pressure cooker. I bought a bottle of Herdez salsa verde and kicked it up a bit.

Sarah's FREAKING AWESOME Salsa Verde:
1 - 16 oz. bottle of Herdez salsa verde
1 medium white onion, chopped
1 splash of lime juice
1/2 a serrano pepper with or without seeds
2 handfuls of cilantro, chopped

Mix all together and savor. You can really add any combination of the ingredients listed above. Warning...this salsa is FABULOUS!!!!

I warmed up some corn tortillas and served the pork with the salsa. You're going to love me for this one!!! The fact that I don't have a picture of the final product goes to show how amazing these babies turned out.

Tuesday, October 21, 2008

Spicy Corn Bread

I have been craving corn bread for some time and decided tonight was the night. Continuing with the Mexican theme Alex and I started this week, I shook up the corn bread with some cheese, onions and jalapeno. WHOOHOOO!!!!!!

This was the side dish to my ultimate, FANTASTIC, Mexican, main course. But the main course is a SECRET...until tomorrow. It is killing me not to tell you what our main course was tonight...but, I have to hold you in suspense! Your mouth should be watering now...In the meantime, you're going to have to settle with my spicy corn bread. :)
The best part about this corn bread is it is easy as all get out to make even better! I followed the directions on the side of the Quaker Corn Meal box:

1-1/4 cups all-purpose flour
3/4 cup Quaker Corn Meal
1/4 cup sugar
2 teaspoons baking powder
1/2 teaspoon salt (optional)
1 cup skim milk
1/4 cup vegetable oil
2 egg whites or 1 egg beaten
I and added 3/4 cup of cheddar cheese, half a jalapeno...which I later realized was a MONSTER sized serrano - HOLY SPICINESS!!!!- and three green onions chopped. Mix it all up and follow the directions on the side of the cornmeal box. Heat oven to 400 F. Grease 8 or 9 inch pan. Combine dry ingredients. Stir in milk, oil and egg, mixing just until dry ingredients are moistened. Pour batter into prepared pan. Bake 20-25 minutes or until light golden brown and wooden pick inserted comes out clean. Serve warm. 9 Servings.Now, note that the recipe on the side of the Quaker Corn Meal box says '9 Servings'. Now look at what Alex did before I could stop him. When I asked him why he cut it into such small pieces he said he likes them small because they taste yummier that way. I beg to differ...I think they taste better when they are HUGE Texas sized pieces...but I guess I will have to continue to crave a big bite into a BIG piece of corn bread.
This was how he served them up on our plates. :)

Monday, October 20, 2008

Fajita's!

When Alex and I went to the grocery store yesterday we were on a Mexican food kick...you'll see why later in the week. :) Alex scored a pretty sweet flank steak this week and decided to make fajitas with it tonight! Fajitas are so simple and pure yum!
Alex put the flank steak in the oven for 15 minutes at 350 F to 'tenderize it'. Does that work or is he talking silliness? You tell me. Afterwards he grilled it for a couple of minutes on the stove top until there were grill marks. 
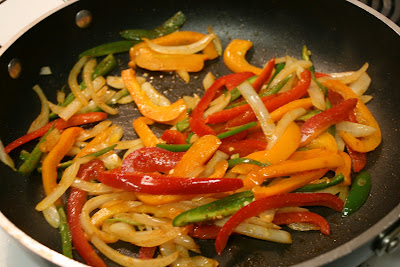
In the mean time he cut up and cooked a white onion, half a red pepper, half an orange pepper, a couple of jalapenos in olive oil along with a lot of love. <--- Alex's words :) He seasoned the peppers with cayenne and cummin...just a pinch or two of each. He cooked them perfectly. They were a little crunchy and a little soft. I hate soft and squishy peppers on fajitas.
Combine the meat and peppers in a tortilla and eat!
I made some yummy guacamole to go with the fajitas! PERFECT!!!

Saturday, October 18, 2008

Montreal!

Phew, I'm back! I had to go to Montreal for work this last week. It was a whirlwind trip. I traveled all day Wednesday, arriving in Montreal at Midnight. I was up at 7am to head off to meetings 6 blocks from my hotel. I was in meetings all day Thursday without wireless access so I spent a couple of hours back in my room catching up on what I was missing at the office. I got out for dinner at a local restaurant and snuck into a touristy shop for souvenirs. The next morning I was off to meetings until noon and then ran to the airport to catch a flight back to the US. I had three connections and didn't arrive in Utah until Midnight. DANG! I'm tired!

I had little time to see Montreal, but I LOVED it! I love that everyone speaks fluent French and English. That is so impressive. Each time I head to Canada I HAVE to get anything Maple I can get my hands on. Here are the yummy items I found at the airport...how unique is that? :(

I love this bottle of syrup...it looks like Canadian Whiskey!

These cookies KICK ASS! You can find these cookies online at Maple Grove Farms...of Vermont...What the....?
My best find was this Maple Tea. It is so smooth! It is great with or without sweetener...but never fear...it isn't like drinking straight up Maple Syrup. It is mildly sweet all on it's own. My favorite part is the wood box it comes in! It is so cute!
I feel bad I didn't get to see more of the city...I mean...I feel bad I didn't get to see the city at all! I was so busy I just saw the 6 blocks to and from the office and the restaurant. I NEED to get back and spend some serious tourist time.

Tuesday, October 14, 2008

Blood, Sweat, but no tears.

Alex is on board with the pumpkin fury going on. We bought a pumpkin this weekend so Alex could make Pumpkin Risotto. WHOOHOO!!! He was so determined to make the pumpkin risotto that he inadvertently cut himself! He was peeling the skin off the pumpkin to cook it up and sliced into his hand. My poor Sweetie!

This really is Alex's post. He took ALL the pictures...but left it up to me to post it. :) He is so funny...look at the way he took the first picture...see our ceramic pumpkin with the Hershey's kiss in the mouth? The pumpkin was hungry.
Pumpkin Risotto:
2 tablespoons olive oil
1 small onion, finely chopped
1 (3/4 to 1 pound) pumpkin, peeled and chopped into bite-sized pieces
2 fresh bay leaves
3 cups vegetable stock, plus 1 cup vegetable stock
1 1/2 cups arborio rice
3 tablespoons freshly grated Parmesan
1 tablespoon butter
Sea salt
Freshly ground black pepper
Pumpkin Puree:
In a large heavy-bottomed pot, heat olive oil and then add the onions. Gently fry until soft and translucent. Add the pumpkin, bay leaves and 1 cup of the vegetable stock. Bring to a simmer and cover. Steam over low heat for 15 to 20 minutes. Add a tablespoon of remaining stock to the pumpkin base and mash it down into a puree using the back of a wooden spoon or spatula.
Risotto:
In a large, heavy-bottomed pan, heat some olive oil and add the rice. Add the remaining stock and cook for 12 minutes with the lid on until the stock has been absorbed, the rice is al dente, and has a lovely creamy consistency. Add the pumpkin puree into the risotto pan and stir together.
Finally, add freshly grated Parmesan and butter to the pan and stir well. Season with sea salt and pepper.
Serve the risotto on individual plates and spoon the Amarone Wine Sauce over top.
This recipe is a Tyler Florence recipe that includes a recipe for Amarone Sauce...from past experience, DON'T MAKE IT WITH THE AMARONE SAUCE. We made this same pumpkin risotto recipe last year with the amarone sauce and it wasn't too yummy. You can find the whole recipe at Food Network.
This is a GREAT recipe for Pumpkin Risotto. It is a little involved with cooking the pumpkin down, but it is worth the effort.

Sunday, October 12, 2008

Orange Chicken

Here's a news flash for some of you...I used to be a vegan. Seriously. I dated this vegan guy for a while and thought I would see what it was all about. I hated to give up my favorite foods so I went out of my way to create vegan meals I loved. I even posted a couple of recipes on a vegan website called vegweb. My favorite was a recipe for General Taos Tofu. It was pretty decent for a vegan recipe.

I wanted something asian this weekend, but not General Taos...fortunately I happened on a recipe for Orange Chicken on Annie's Eats site.

Orange Chicken:
For the marinade and sauce:
1 ½ lbs. boneless skinless chicken thighs or breasts, cut into 1 ½” pieces
¾ cup low sodium chicken broth
¾ cup fresh squeezed orange juice
1 ½ tsp. grated orange zest
8 thin strips orange peel (optional)
6 tbsp. distilled white vinegar
¼ cup soy sauce
½ cup dark brown sugar
3 medium garlic cloves, minced
1 tbsp. fresh grated ginger
¼ tsp. cayenne pepper
1 tbsp. plus 2 tsp. cornstarch
2 tbsp. cold water

For coating and frying:
3 large egg whites - I used Egg Replacer
1 cup cornstarch
½ tsp. baking soda
¼ tsp. cayenne pepper
3 cups peanut oil (or canola oil)

For the marinade and sauce, place the chicken in a Ziploc bag; set aside. In a large saucepan, combine the chicken broth, orange juice, zest, vinegar, soy sauce, brown sugar, garlic, ginger and cayenne pepper; whisk until the sugar is fully dissolved. Measure out ¾ cup of the mixture and pour it into the bag with the chicken; press out as much air as possible and seal the bag, making sure that all pieces are coated with the marinade. Refrigerate 30-60 minutes, but no longer. Bring the remaining mixture in the saucepan to a boil over high heat. In a small bowl, stir together the cornstarch and cold water; whisk the cornstarch mixture into the sauce. Simmer, stirring occasionally, until thick and translucent, about 1 minute. Off the heat, stir in the orange peel (if using); set the sauce aside.

For the coating, place the egg whites in a pie plate and beat with a fork until frothy. In a second pie plate, whisk together the cornstarch, baking soda and cayenne until combined. Drain the chicken in a colander or large mesh strainer; thoroughly pat the chicken dry with paper towels. Place half of the chicken pieces in the egg whites and turn to coat. Transfer the pieces to cornstarch mixture and coat thoroughly. Place the dredged chicken pieces on another plate or a baking sheet. To fry the chicken, heat the oil in an 11- to 12-inch dutch oven or straight sided sauté pan with at least 3 qt. capacity over high heat until the oil reaches 350° on an instant read or deep fry thermometer. Carefully place half of the chicken in the oil; fry to golden brown, about 5 minutes, turning each piece with tongs halfway through cooking. Transfer to a paper towel lined plate. Return the oil to 350° and repeat with the remaining chicken.

To serve, reheat the sauce over medium heat until simmering, about 2 minutes. Add the chicken and gently toss until evenly coated and heated through. Serve immediately.

I realized when I got to the breading part that I didn't have any eggs. CRAP! I didn't want to run to the store so I used the vegan egg replacer I used for my General Tao's tofu. This recipe turned out so much better than my tofu version of General Tao's. It was a better than the orange chicken at Panda Express because it wasn't thickly coated in breading. I also only used a 1/2 cup of canola oil for frying so they didn't soak up all the oil. It was GREAT!

What do you have dessert when you eat yummy Orange Chicken? A fortune cookie! Yep. Alex and I keep a box of fortune cookies around just in case we have yummy asian food.
What did my fortune say?