Showing posts with label Breakfast. Show all posts

Friday, April 5, 2013

Raspberry Oat Muffins

While shopping in Alexandria I found a fun cook book for my sister-in-law's birthday, Pretty Delicious by Candice Kumai. I liked it so much I bought a copy for me too!  The book claims to have 'lean and lovely recipes for a healthy and happy new you.'  Judging by this one recipe, I am pretty impressed.


Raspberry Oat Muffins:
1 1/2 cups all-purpose flour
1 cup quick oats - I used regular oats
3/4 cup brown sugar
2 teaspoons ground cinnamon
1 teaspoon baking powder
1/2 teaspoon baking soda
Pinch of sea salt
2 large eggs
3/4 cup unsweetened applesauce
2 tablespoons honey
1 cup frozen raspberries

Preheat oven to 400 degree's F. Line a 12-cup muffin tine with paper liners.

Whisk the flour, oats, brown sugar, cinnamon, baking powder, baking soda, and salt together in a large bowl.  Whisk the eggs, applesauce, and honey together in a medium bowl.  Stir the applesauce mixture into the flour mixture until completely incorporated.  Gently fold in the frozen raspberries.

Using a 1 1/2 oz. ice cream scoop, portion the batter into the paper cups, filling each about 3/4 full.  Bake, rotating midway though cooking, until golden brown, the center of the muffin resists light pressure, and a toothpick inserted into the center comes out clean, about 20 minutes.

Let cool for 20 minutes...because the raspberries come out SCREAMING HOT!!!!...then transfer to a wire rack to cool completely.

I tend to be suspect of 'healthy' recipes because they say they are yummy, but then taste like card board. Not so with this recipe.  I was pleased to see the amount of sweetening agents in this recipe, because even though it eliminates oil, it doesn't scrimp on flavor.  I am totally going to use blueberries the next time I make this recipe!!!

Wednesday, December 19, 2012

Blueberry Oatmeal Pancakes

My daughter is pretty crazy about pancakes and it is our weekend ritual to have them once a week so we are constantly trying out new recipes to keep them exciting.  This recipe for Blueberry Oatmeal Pancakes was a pretty decent find, but the next time I make them I'm going to do some serious tweeking.  I was vaguely aware when I was making them that there were no spices added to the mix.  There were so many positive reviews online that I assumed the pancakes stood firm all on their own...but they didn't.  Don't get me wrong, these pancakes were good, but could use some vanilla and/or almond extract, cinnamon and nutmeg.  I would also cut back on the milk as the batter was a touch runny causing the pancakes to be flat.

Blueberry Oatmeal Pancakes:
1/2 cup wheat flour
1/2 cup all purpose flour
2 tablespoons brown sugar
2 tablespoons baking powder
3/4 teaspoon salt
1 1/2 cups old fashioned oats
2 cups milk
3 eggs beaten
1/4 cup vegetable oil
1/2 cup frozen blueberries

Preheat lightly oiled griddle over medium heat.  In a large bowl mix whole wheat and white flours with brown sugar, baking powder and salt.  In a small bowl, mix milk and oats.  Whisk in eggs and oil.  Pour into dry mix all at once.  Continue mixing until smooth.  Gently fold in blueberries.

Pour batter about 1/4 cup at a time onto the prepared griddle.  Cook 1 to 2 minutes, until bubbly.  flip and continue cooking until lightly browned on both sides.

Thursday, November 15, 2012

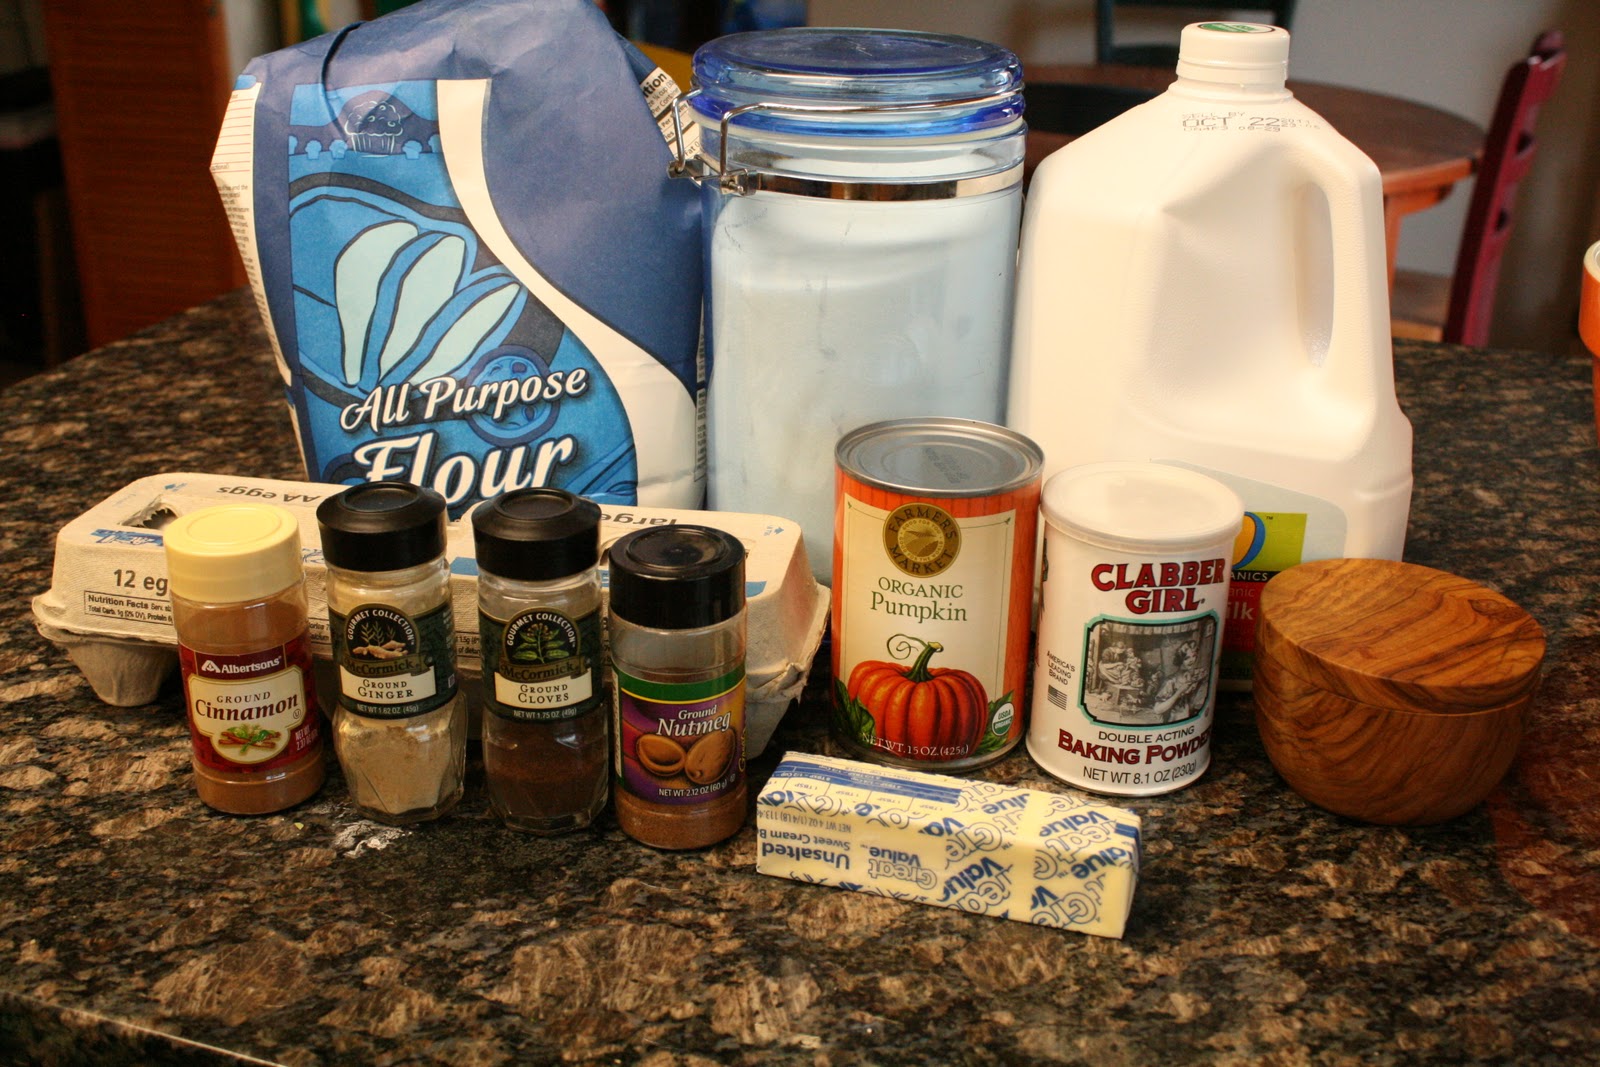
Pumpkin Waffles with Apple Cider Syrup

'Tis the season for yummy pumpkin!  I honestly can't get enough pumpkin from October to December, so I stock up on canned pumpkin during the holiday season to make sure I have enough to get me through January to September. :)  This recipe for Pumpkin Waffles and Apple Cider Syrup is a BIG reason why!

Of course the pumpkin waffles are great, but the Apple Cider Syrup is what takes this breakfast to delectable levels of pure yummy goodness!  PLEASE, I beg of you, DO NOT SUBSTITUTE  the apple cider for regular apple juice...you will be so sad if you do!

Pumpkin Waffles with Apple Cider Syrup
2 1/2 cups all-purpose flour
4 teaspoons baking powder
2 teaspoons ground cinnamon
1 teaspoon ground allspice
1 teaspoon ground ginger
1/2 teaspoon salt
1/4 cup brown sugar
1 cup canned pumpkin
2 cups milk
4 eggs, separated....if you want to go to the effort of whipping up the egg white separately.
1/4 cup canola oil

Apple Cider Syrup
1/2 cup white sugar
1 tablespoon corn starch
1 teaspoon ground cinnamon
1 cup apple cider
1 tablespoon lemon juice
2 tablespoons butter

Preheat a waffle iron according to manufacturer's instructions.

Combine the flour, baking powder, cinnamon, allspice, ginger, salt and brown sugar in a mixing bowl. In a separate bowl, stir together the pumpkin, milk and egg yolks.  Whip the egg whites in a clean dry bowl until soft peaks form (I always omit this part because I'm lazy...I think they taste just as good).

Stir the flour mixture and 1/4 cup melted butter to the pumpkin mixture, stirring just to combine.  Use a whisk or rubber spatula to fold 1/3 of the egg whites into the batter, stirring gently until incorporated (See, so much effort to have fluffy batter...I really have tried it both ways and don't think it makes much difference). Fold in the remaining egg whites.  Cook waffles according to manufacturer's instructions.

To make the syrup, stir together the sugar, cornstarch and cinnamon in a sauce pan.  Stir in the apple cider and lemon juice.  Cook ever medium heat until mixture begins to boil; boil until the syrup thickens.  Remove from heat and stir in the 2 tablespoons of butter until melted.  Serve warm.

Sunday, July 22, 2012

Gluten Free Strawberry Pancakes...The Best Yet!

It is a Sunday morning tradition to make a yummy breakfast at our house.  We are getting ready to move and have been trying to clean out our freezer and pantry of food so we don't have to get rid of it so we made Gluten Free Strawberry Pancakes!!!

Alex is a pancakes eating MONSTER, but always feels a little barfy after eating his weight in pancakes so we decided to try out Bob's Gluten Free Flour when making our Sunday morning treat.  I am not a fan of complicated meals, so the recipes for gluten free pancakes that include xanthum gum and almond flour are lost on me.  Bob's is a PERFECT substitute for flour.  The only draw back is that gluten free products have a tendency for an AFTER TASTE.  I can't even describe what that taste is...it is just...something.  So when I make gluten free pancakes, I always make sure they are flavored in some way.

Gluten Free Strawberry Pancakes:
1 3/4 cups buttermilk
2 cups Bob's Gluten Free Flour
4 tablespoons sugar
1 teaspoons baking powder
2 teaspoon baking powered
1 teaspoon baking soda
1 teaspoon salt
2 eggs
2 tablespoons olive oil
1/2 teaspoon almond extract
1 cup strawberries, chopped

Mix all the ingredients together and cook on griddle over medium heat.


The addition of the almond extract brings out the sweetness in the strawberries.  Alex actually told me this recipe was the BEST gluten free pancake recipe YET!   YEAH!!!   

Wednesday, July 18, 2012

Little Bites of Meaty, Cheesy Goodness!

I attended a potluck breakfast awhile back and one of the ladies brought an amazing recipe that contained three ingredients, Sausage, Cheese and Bisquick.  I know what your saying...REALLY?  What is the binding ingredient?  That doesn't sound crazy flavorful!  Guess what?  These babies are FLAVOR BOMBS!  I saw several variations on Allrecipes.com for this recipe ranging from the amount of Bisquick to the cook time.  Since I couldn't remember the recipe my potluck friend told me, I decided to do a combination of several different recipes from Allrecipes.com.

Bisquick Sausage Bites:
1lb Jalpeno sausage
2.5  Cups cheese
3 Cups Bisquick
Water, as needed

Preheat oven to 350F

Thoroughly combine ingredients...this is going to take some serious elbow grease because you are forcing the sausage and cheese and Bisquick together and I think they are secretly enemies.  Be forewarned.  As water as needed.  Roll into 1.5 inches balls of dough and put on cookie sheet.  Cook for 25 minutes.

These little bites are ADDICTIVE!  Oh my goodness!  I could eat them all day, in fact, that is just what I did the day I made them, breakfast, snack and lunch!  The next time I make these babies I'm going to use less Bisquick and more cheese.

Sunday, September 18, 2011

'Tis the season for PUMPKIN!

My favorite thing about fall?  PUMPKINS!  I was dismayed to find that none of the grocery stores had pumpkin stocked when I searched it out.  I searched high and low and ended up finding it at Sunflower Market.  I plan to buy a case of it when the regular grocery stores start carrying it.

I've recently become addicted to Pinterest.  I originally thought it was just a crafting web site, but no, like an outfit...pin it...like a recipe...pin it!  Then you can scroll through all the 'pins' other people have found and you can pin it on your wall.  I have been pinning recipes like nobody's business!  I am especially glad I found the following recipe.  It is supposed to be a knock off of the Starbucks Pumpkin Scones, but I think they're better!  I am always disgusted that the food at Starbucks isn't made fresh in their individual stores.  Everything is day old...or more!  These babies are FRESH!  Warm from the oven scones beat hard crumbly ones ANY DAY!...especially if they are pumpkin!  :)

Starbucks Pumpkin Scones Knock Off Recipe:

Starbucks Pumpkin Scones Ingredients :
  • 2 cups all-purpose flour

  • 7 tablespoons sugar

  • 1 tablespoon baking powder

  • 1/2 teaspoon salt

  • 1/2 teaspoon ground cinnamon

  • 1/2 teaspoon ground nutmeg

  • 1/4 teaspoon ground cloves

  • 1/4 teaspoon ground ginger

  • 6 tablespoons cold butter

  • 1/2 cup canned pumpkin

  • 3 tablespoons half-and-half

  • 1 large egg

  • 1 cup powdered sugar

  • 1 tablespoon powdered sugar

  • 2 tablespoons whole milk

  • 1 cup powdered sugar

  • 3 tablespoons powdered sugar

  • 2 tablespoons whole milk

  • 1/4 teaspoon ground cinnamon

  • 1/8 teaspoon ground nutmeg

  • 1 pinch ginger

  • 1 pinch ground cloves


  • Preheat oven to 425 degrees
     F. Lightly oil a baking sheet or line with parchment paper.


    Combine flour, sugar, baking powder, salt, and spices in a large bowl. Using a pastry knife, fork, or food processor, cut butter into the dry ingredients until mixture is crumbly and no chunks of butter are obvious. Set aside.In a separate bowl, whisk together pumpkin, half and half, and egg. Fold wet ingredients into dry ingredients. Form the dough into a ball.  


    Pat out dough onto a lightly floured surface and form it into a 1-inch thick rectangle (about 9 inches long and 3 inches wide). Use a large knife or a pizza cutter to slice the dough twice through the width, making three equal portions. Cut those three slices diagonally so that you have 6 triangular slices of dough. Place on prepared baking sheet. Bake for 14–16 minutes. Scones should begin to turn light brown. Place on wire rack to cool.

    To make the plain glaze:
    1. Mix the powdered sugar and 2 tbsp milk together until smooth.
    2. When scones are cool, use a brush to paint plain glaze over the top of each scone.
    To make the spiced icing
    Combine the ingredient for the spiced icing together. Drizzle this thicker icing over each scone and allow the icing to dry before serving (at least 1 hour). A squirt bottle works great for this, or you can drizzle with a whisk.

    I'm not sure why people who create these recipes call for SO MUCH glaze!  Let alone TWO glazes!  I didn't bother with the plain glaze and halved the spiced glaze.  I have more than enough for the scones.  The glaze really IS the frosting on this recipe!  It was SO tasty and spicy!!!  If I ever get around to making pumpkin donuts, I'm going to use this glaze on them too!!!


    Monday, August 8, 2011

    Strawberry Muffins

    I am a touch crazy when it comes to muffins.  I am constantly searching out new recipes for a muffin to dream about, crave and DEVOUR!  This recipe is pretty damn PERFECT!  The consistency of these muffins was not too dense, not too fluffy and got better as they cooled down.  The best part? They weren't flat!  They actually raised to have nice puffy tops at altitude. 

    I have not made strawberry muffins before, but had some strawberries I needed to use up.  The recipe also claims you can use defrosted strawberries cut up too.  I know what I am doing with my Costco sized bag of frozen strawberries!!!  I have seriously been craving these babies since I made them.  The recipes makes 8-9 muffins, which I LOVE because it keeps me from eating too many!  Several people on Allrecipes.com suggested making a glaze for the top of the muffins so I tried it out (1/2 cup powdered sugar with 1/2 tsp vanilla).  HEAVEN!!!!!!  I suspect I'll be craving these babies the next time I'm pregnant!

    Strawberry Muffins
    1/4 cup canola oil
    1/2 cup milk
    1 egg
    1/2 teaspoon salt
    2 teaspoons baking powder
    1/2 cup white sugar
    1 3/4 cups all-purpose flour1 cup chopped strawberries

    Preheat oven to 375 degrees F (190 degrees C) oil an 8 cup muffin tin, or use paper liners. 

    In a small bowl, combine oil, milk, and egg. Beat lightly. In a large bowl, mix flour, salt, baking powder and sugar. Toss in chopped strawberries and stir to coat with flour. Pour in milk mixture and stir together.

    Fill muffin cups. Bake at 375 degrees F (190 degrees C) for 25 minutes, or until the tops bounce back from the touch. Cool 10 minutes and remove from pans.

    Thursday, July 21, 2011

    Ellie Krieger Pumpkin Muffins

    I am ALWAYS on the search for ways to use pumpkin, in part because I LOVE pumpkin and also because it is a good way to sneak in vegetables into my daughter's food without her knowing. :)  Ellie Krieger, Food Network Celebrity Chef, is all about making yummy comfort dishes healthy and flavorful and I am GLAD for it!  Because if it is healthy, it means I can eat more of them.  I actually made these muffins in a mini-muffin pan so I could freeze them for later gorging.  It actually paid off...except for when I defrost the zip-lock bag full of mini muffins.  I have managed to eat the entire bag each time. 

    These muffins are chalked full of spice and flavor, which is why I LOVE them...I don't just love them, I'm addicted to them.  I've even used the measurements from the spices for these muffins to make pumpkin pancakes.  LAAAAAAAA!!!!!!  Those are the angels singing. 

    Ellie Krieger Pumpkin Muffin Recipe:
    1 cup all-purpose flour
    1 cup whole-grain pastry flour
    1 teaspoon baking soda
    1/2 teaspoon salt
    1 teaspoon ground cinnamon
    1/2 teaspoon ground ginger
    1/4 teaspoon ground cloves
    1/8 teaspoon ground nutmeg
    3/4 cup packed dark brown sugar
    3 tablespoons unsulphered molasses
    1/4 cup canola oil
    2 large eggs
    1 cup canned pumpkin
    1 teaspoon vanilla extract
    3/4 cup lowfat buttermilk
    1/4 cup raw, unsalted pumpkin seeds

    Preheat oven to 400 degrees F. Coat a 12-cup muffin pan with cooking spray.

    In a medium bowl, whisk together the all-purpose and whole-wheat flours, baking soda, salt, cinnamon, ginger, cloves, and nutmeg.

    In a large bowl, whisk the sugar, molasses, oil and 1 egg until combined. Add the other egg and whisk well. Whisk in the pumpkin and vanilla. Whisk in the flour mixture in 2 batches, alternating with the buttermilk. Whisk just until combined.

    Pour the batter into the prepared muffin pan and sprinkle with the pumpkin seeds. Tap the pan on the counter a few times to remove any air bubbles. Bake for 20 minutes or until a wooden pick inserted in center of 1 of the muffins comes out clean.

    Let cool on a wire rack for 15 minutes. Run a knife around the muffins to loosen them and unmold. Cool completely on the rack.

    Thursday, June 23, 2011

    Yogurt Pie? Oh YEAH!

    I LOVE to recipe surf, especially for fun kid foods (there is a kid in all of us).  I came across a recipe on a blog called 'Cooking with my Kid' that had a recipe for a Yogurt Parfait PIE!  That's right, a PIE!  What things does my two year old like?  Fruit, yogurt, cheerios and graham crackers!
    Yogurt Parfait Pie Recipe
    Prep Time: 8 to 10 hours (mostly unattended)  Cooking Time: 5 to 10 mins

    Crust Ingredients:
    1 ½ cups finely crushed graham crackers
    3 tablespoons lowfat vanilla yogurt
    2 tablespoons brown sugar
    Ingredients for the Filling:
    1 cup sliced strawberries
    1 cup blueberries
    1 teaspoon sugar
    ½ cup water
    2 egg yolks
    1 teaspoon cornstarch
    1 ½ cups nonfat or lowfat vanilla yogurt
    1 envelop unflavored gelatin

    1.    Preheat the oven to 350 degrees.
    2.    In a medium bowl, combine yogurt, crushed Cheerios and sugar.
    3.    Work the mixture together with your hands until it becomes clumpy and moist.
    4.    Press mixture into a 9 inch pie plate making sure to push it up along the sides.
    5.    Bake in the oven for 5 to 10 minutes or until set and just starting to brown.
    6.    Let cool completely (overnight is best) before adding filling. - I TOTALLY FORGOT TO DO THIS!
    7.    To make the filling, combine strawberries, blueberries and sugar in a medium bowl and set aside.
    8.    In a small saucepan, over low heat, whisk together ¼ cup water, egg yolks and cornstarch and continue stirring until thick. Remove from heat.
    9.    Meanwhile, in another small saucepan, sprinkle gelatin over remaining ¼ cup water, whisk together and dissolve over medium heat for about 5 minutes.  Remove from heat.
    10. Combine egg mixture and gelatin.
    11. Combine yogurt with berries and then fold berries into egg / gelatin mixture.
    12. Pour into prepared piecrust and refrigerate until set. At least 2 hours.
     This was a little unusual.  It was like pudding and jello all at the same time. I REALLY liked the crust.  It was super moist, which made for a difficult time spreading it along the pie pan.  My husband thought it was a dessert, but when you consider it only has three tablespoons of sugar...it's healthy!  :)

    Tuesday, April 6, 2010

    HAPPY EASTER with Eggs Benedict

    Since having my daughter I have been trying to solidify our family holiday traditions.  Two years ago we invited friends over for an Easter brunch of eggs benedict.  That year I bought Williams Sonoma's egg  poacher pan and their fun Easter linens and we decorated cupcake's in the shape of Easter eggs with my egg shaped muffin pan.  It was AWESOME!  I wanted to recreate that Easter brunch of years gone by.  It isn't as though my daughter can appreciate it at 9 months, but it makes me feel better knowing she has something to look forward to at the holidays. 

    The first time I made eggs benedict, I used a recipe that called to combine the egg and butter in a blender with the butter cooking the egg.  It emulsified FABULOUSLY, but while I was keeping it warm on the stove as my friends were showing up, it separated.  It was still GREAT...what isn't great smothered in egg and butter?...but it didn't make for a pretty presentation. 

    This recipe ROCKED!  I cooked up the hollandaise sauce in a homeade double boiler using a metal mixing bowl over a pan of boiling water.  The key to this recipe is whisking the sauce the entire cooking time as you slowly add the butter.  AND....it didn't separate!  I left it out ALL DAY expecting it to separate and it didn't!  I had to throw it out afterward, but at least I was reassured that this recipe is fail safe. 

    I poached (HAHAHAHA) this recipe off Allrecipes.com.  This truly is a handy website.  I LOVE that the recipes are rated.  There is nothing worse that spending a huge amount of time creating a dish only to find that it BLOWS! 

    Eggs Benedict
    4 egg yolks
    3 1/2 tablespoons lemon juice
    1 pinch ground white pepper
    1/8 teaspoon Worcestershire sauce
    1 tablespoon water
    1 cup butter, melted
    1/4 teaspoon salt
    8 eggs
    1 teaspoon distilled white vinegar
    8 strips Canadian-style bacon
    4 English muffins, split
    2 tablespoons butter, softened

    To Make Hollandaise: Fill the bottom of a double boiler part-way with water. Make sure that water does not touch the top pan. Bring water to a gentle simmer. In the top of the double boiler, whisk together egg yolks, lemon juice, white pepper, Worcestershire sauce, and 1 tablespoon water.

    Add the melted butter to egg yolk mixture 1 or 2 tablespoons at a time while whisking yolks constantly. If hollandaise begins to get too thick, add a teaspoon or two of hot water. Continue whisking until all butter is incorporated. Whisk in salt, then remove from heat. Place a lid on pan to keep sauce warm.

    Preheat oven on broiler setting. To Poach Eggs: Fill a large saucepan with 3 inches of water. Bring water to a gentle simmer, then add vinegar. Carefully break eggs into simmering water, and allow to cook for 2 1/2 to 3 minutes. Yolks should still be soft in center. Remove eggs from water with a slotted spoon and set on a warm plate.  (FYI - This pan from Williams Sonoma makes poaching eggs so EASY!  Sadly, the pan has doubled in price since I bought it two years ago.)
    While eggs are poaching, brown the bacon in a medium skillet over medium-high heat and toast the English muffins on a baking sheet under the broiler.

    Spread toasted muffins with softened butter, and top each one with a slice of bacon, followed by one poached egg. Place 2 muffins on each plate and drizzle with hollandaise sauce. Sprinkle with chopped chives and serve immediately.

    My only complaint about this recipe is that I thought it tasted a little too lemony.  Alex and my mom LOVED it!  Sometimes I wonder if they say that stuff to make me feel better about slaving away in the kitchen.  You'll have to let me know what you think!

    Sunday, January 24, 2010

    Muffins to start the year off with!


    As Alex and I were planning our wedding I was your typical bride, buying up every wedding magazine known to woman.  I could look at wedding dresses ALL DAY LONG and many times I did.  Through all the magazine whoring I did, I found a FABULOUS magazine called Modern Bride Beauty & Fitness.  It has all the requisite make up and hair stuff, workout tips, but more importantly, it had a food section! 


    I LOVE muffins.  Blueberry muffins were the only thing I craved while I was pregnant.  Sadly, I had misplaced this magazine and couldn't make my FAVORITE muffins.  But one of the benefits of moving is that displaced items have a way of becoming placed again.  :)  I should mention, when I was pregnant I didn't just crave blueberry muffins.  I craved blueberry muffins with streusel on top.  But those muffins will give you a muffin top!  These babies only have 162 calories each!  Well, maybe a little more because it doesn't take into consideration the frozen blueberries I add...but their fruit, they can't be that bad.

    Granola-Streusel Muffins
    1 cup unbleached all purpose-flour
    3/4 cup whole-wheat flour
    2 tablespoons sugar
    1 tablespoon baking powder
    1/2 teaspoon salt
    1 cup reduced-fat (2%) milk
    1 egg, beaten
    2 tablespoons canola oil
    2 tablespoons all-natural chunky applesauce


    Streausel Topping
    3 tablespoons canola oil
    2 tablespoons flour
    2 tablespoons brown sugar
    2 tablespooons instant oils


    Preheat oven to 375 degrees.  Coat a 12 cup muffin tin with cooking spray.   In a large mixing bowl, sift together first 5 ingredients.  make a well in the center and pour in next 4 ingredients.  fold ingredients together just until combined; don't overmix or the muffins will be dense.  Evenly divide batter among muffing cups.  For topping:  In a small bowl, whisk together oil, flour and sugar until smooth.  Drizzle on muffins then sprinkle with oats.  Bake 20 to 25 minutes, or until a toothpick comes out clean. 

    Again, I added frozen blueberries to these muffins for the added fruit bonus.  I also added an extra tablespoon of flour to the struesel topping because I don't like it all runny.  You're going to DIG these muffins!  Naturally, I LOVE these muffins so much, I ate them before I realized I didn't get a picture of the finished product...that happens a lot around here.

    Wednesday, November 11, 2009

    Thanksgiving Leftovers - Stuffing Pancakes


    That's right...Thanksgiving leftovers.  My Dad just came for a visit and we celebrated Thansgiving with him a little early.  As a result, I already have leftovers.  The morning after, my Dad headed for the kitchen to cook himself up some breakfast.  Since he is the one that inspired my own cooking, I hurried after him.  To my horror and surprise, he told me he was going to make a stuffing pancake.  The shock and awe didn't last too long...I trust my Dad's judgement when it comes to pancakes.  When I was growing up my Dad created something called a noodle pancake (recipe to come around Christmas).  He combined eggs and ramen noodles and put spaghetti sauce on them.  I know it sounds like a pure oddity...rest assured it ROCKS.  We have it EVERY year at my house on Christmas morning.  I get sidetracked...BACK to Stuffing Pancakes.

    Stuffing Pancakes:
    1 1/2 cups of leftover stuffing...my Dad made stuffing with cranberries, sausage and onions...YUM!
    1 egg

    Mix leftover stuffing and egg together.  Heat a greased frying pan on medium heat and cook evenly on both sides about 2-3 minutes on both sides.  You want to make sure the egg is cooked through.


    Serve with left over gravy and cranberry relish.


    My Dad scores again.   Very tasty pancakes...it makes me wish I had stuffing around more often.

    Sunday, March 15, 2009

    Kolaches

    I was playing around online this weekend and saw a recipe for Kolaches. I was curious about them because I had seen a recipe for Kolaches in Rebecca Rather's, The Pastry Queen cook book The first comment on the blogger's site mentioned The Pastry Queen cook book and I took this to mean I HAD to make these babies for breakfast Saturday morning. So at 10pm Friday night I got started making the dough.

    When I told Alex I was making this recipe he told me it was a Polish recipe his family used to make when he was a kid. I told him the recipe said it was a Czech recipe so we agreed to call it an Eastern European recipe. It is fun to find family history in food!

    The original recipe says it yield 16 to 18 buns, but I have found these recipes make nearly double what the recipe says it does so I halved the recipe. I have included the full recipe...but I am warning you in advance!

    Kolaches:
    Dough:
    2 cups milk
    1 (1/4 ounce) package active dry yeast
    1/2 cup luke warm water (110 to 115 degrees F)
    1/2 cup (1 stick) unsalted butter
    2 large eggs
    1 1/4 cups sugar
    1 teaspoons salt
    8 1/2 cups all purpose flour
    Peach Filling:
    2 cups pitted, chopped peaches
    1 cup good quality peach jam - we used my spiced peach jam
    Streusel Topping:
    1/2 cup all purpose flour
    1/2 cup sugar
    3 tablespoons chilled unsalted butter, cut into small pieces
    To make the dough: Warm the milk in a medium saucepan set over medium heat until it begins to steam and form a skin; do not boil. cool for 10 to 15 minutes until it registers 110 to 115 degrees F on a candy thermometer. Dissolve the yeast in the luke warm water and let sit until foamy, about 5 minutes. Melt the butter. Let cool for 5 minutes.
    In a large bowl, whisk together the eggs, sugar, salt, and melted butter. Add the cooled milk and yeast mixture. Gradually add the flour to the batter, 2 cups at a time. User your hands or a wooden spoon to mix the flour with the wet ingredients. Keep adding the flour until it is completely incorporated and the dough begins to hold together. use a light touch; don't pound or overwork the dough or you'll get tough kolaches. The dough will be sticky, moist, and light.
    Lightly grease a large bowl with vegetable oil. Transfer the dough to the bowl, cover loosely with plastic wrap, and let it rise in a warm, draft free place until doubled in size, 1 or 2 hours (a dent should remain when the dough is touched lightly). Leaving the dough in the bowl, punch it down until it deflates. Cover the bowl with plastic wrap, and refrigerate for at least 4 hours or overnight.

    I am not a born baker and I am a VERY slow learner. See this picture. This is what my dough looked like the next morning. It didn't rise at all for me in the 1 1/2 I let it rise in a warm oven. I was worried I destroyed the recipe because I am not friendly with yeast...but the recipe is VERY forgiving. Thank goodness!!!

    For the peach filling: combine 2 cups pitted, chopped peaches with 1 cup good quality peach jam in a medium bowl.

    Grease a 12 by 17 inch baking sheet with butter or cooking spray. With lightly oiled fingertips, shape the dough into 2 1/2 inch-diameter balls, about the size of small limes. arrange the balls evenly on the baking pan.

    To fill the kolaches, user your thumb or finger to make a generous indentation in the middle of each dough ball. mount about 1 heaping teaspoonful of peach filling in the indentation. Cover the rolls with a clean tea towel and let the rolls rise in a warm, draft free place until almost doubled in size. About 1 hour. THIS is where the recipe was forgiving of me. I put the kolaches in a warm oven and the DID double in size.

    Preheat the oven to 375 degrees F.

    To make the streusel topping: user your hands or a food processor to mix the flour, sugar, and butter until crumbly. Scatter the topping over the kolaches just before baking.

    Bake the kolaches until lightly browned on top 25 to 30 minutesCook the Kolaches for 20 minutes before serving.

    Rebecca Rather includes several variations to this recipe at the end of the recipe. Once of those variations is for cheese-filled Kolaches. I used a combination of the cheese and peach filling for my Kolaches.

    For cheese-filled Kolaches: combine 1 14-ounce carton dry-curd cottage cheese (I used cream cheese) with 1/4 cup sugar, the grated zest of 1 lemon, 1 teaspoon vanilla extract, and 2 egg yolks.

    This recipe was pretty dang good. I liked it because it sounds pretty decadent, but it turned out to be a great combination of sweet and bread. Alex LOVED these babies!!!!

    Friday, February 13, 2009

    Veggie Cream Cheese

    I don't know about you, but I LOVE bagels. I especially dig flavored cream cheese. Since becoming pregnant I have become a fan of all natural and try to eat few processed foods. You never know what stuff they put in that cream cheese at the bagel shop to preserve it. You really don't know what they put in cream cheese to preserve it.
    Regardless if this recipe is more natural than what you would get at the bagel shop...I'm going to pretend that it is because it makes me feel better about devouring my morning bagel.

    Veggie Cream Cheese:
    8oz. package of 1/3 fat cream cheese
    1 carrot, shredded
    3 green onions, minced
    1 teaspoon dried parsley
    1/2 teaspoon dried dill
    1/2 teaspoon granulated garlic

    Mix all ingredients until well incorporated. Refrigerate for 1 to 2 weeks. I'm sure this would keep longer...but I'm pregnant and can't afford to see how long it will stretch.
    Man...it's 9pm and I am jonsing for a bagel.

    Saturday, October 11, 2008

    Pumpkin Muffins!

    Remember when I told you I don't follow directions well? Yeah, well it hit again in a BIG way today. I'm going to walk you through my post as my morning happened.

    I was looking for a yummy recipe for pumpkin muffins that wasn't full of fat and sugar and it was hard to find a healthy recipe. Fortunately I stumbled up on a recipe by Ellie Kreiger that didn't just limit the sugar and fat, but it added whole wheat flour. SWEET!

    The recipe calls for butter milk, which I didn't have, but I saw another recipe while I was looking for pumpkin muffin recipes that said I could substitute plain yogurt for buttermilk. I always have plain yogurt on hand for cooking.

    Pumpkin Muffins:
    1 cup all-purpose flour
    1 cup whole-grain pastry flour
    1 teaspoon baking soda
    1/2 teaspoon salt
    1 teaspoon ground cinnamon
    1/2 teaspoon ground ginger
    1/4 teaspoon ground cloves
    1/8 teaspoon ground nutmeg
    3/4 cup packed dark brown sugar
    3 tablespoons unsulphered molasses
    1/4 cup canola oil
    2 large eggs
    1 cup canned pumpkin
    1 teaspoon vanilla extract
    3/4 cup lowfat buttermilk - I used 3/4 cup of yogurt along with a tablespoon of water.
    1/4 cup raw, unsalted pumpkin seeds - I omitted these since I haven't gutted a pumpkin lately.

    Preheat oven to 400 degrees F. Coat a 12-cup muffin pan with cooking spray.

    In a medium bowl, whisk together the all-purpose and whole-wheat flours, baking soda, salt, cinnamon, ginger, cloves, and nutmeg. - I used my mondo large bowl for this and found that I had to transfer the dry ingredients to a medium bowl like the recipe called for.

    In a large bowl, (Notice the bowl in this picture...it is the mondo bowl I put the dry ingredients in. Notice what is missing from the ingredients list?) whisk the sugar, molasses, oil and 1 egg until combined. Add the other egg and whisk well. Whisk in the pumpkin and vanilla. Whisk in the flour mixture in 2 batches, alternating with the buttermilk. Whisk just until combined. - Now I actual thought...how does one over mix a batter? I'm going to make sure I don't over mix this one because the batter looks so fluffy...I wonder if it is because I used yogurt instead of buttermilk.

    Pour the batter into the prepared muffin pan and sprinkle with the pumpkin seeds. Tap the pan on the counter a few times to remove any air bubbles. (Now as I was walking the mondo bowl to the sink, I happened to lick the spoon...I know...I'm an adult and really shouldn't do that because of the uncooked eggs and I might get salmonella...but I do it anyway. But the batter didn't taste very sweet. WAIT, what the....I don't remember putting any sugar in this recipe. Could it really be that healthy that Ellie Kreiger didn't put sugar in it? No. I didn't follow the directions very well. RAH!!!!!)

    Let's see how well the cooking spray works. I had to spoon the batter back into the mondo bowl, add the sugar and over mix the batter to incorporate the sugar.
    Bake for 20 minutes or until a wooden pick inserted in center of 1 of the muffins comes out clean.
    Fortunately my faux pas didn't screw up my pumpkin muffins. They turned out PERFECT! This is a GREAT recipe for a healthy pumpkin muffin. Ellie knows healthy muffins!


    But that wasn't the end of my not following the directions morning. I got my coffee going so it would be ready when I pulled out my yummy pumpkin muffins. I even bought myself some pumpkin creamer to go with my coffee. My coffee maker started making that coffee percolating sound it makes when it has processed all the water through the filter...I grabbed my coffee cup, went to the coffee maker only to see a clear pot of water in the carafe. What the...? Good CRAP! Did I even put a filter in there? Yes, I, did. It's Saturday morning and you wouldn't think I was functioning on a Monday morning. :) I'm worried about what Monday has in store for me.

    Sunday, October 5, 2008

    Biscuits and Gravy for my Sweetie!

    I made my Sweetie's favorite breakfast today with a healthy twist. Alex LOVES biscuits and gravy. There is a joint near our house that makes killer B&G, but they use the fat from cooked sausage to make the gravy. It is yummy, but it is REALLY decadent and the thought make you want to wash your face afterwards. I want my Sweetie to live forever, so I opted for a healthier version of his favorite breakfast...well, kind of.

    To make this dish, I pulled a Sandra Lee. I hate that chick, but she has something when it comes to using pre-made items. I used a gravy mix packet and refrigerated biscuits (this part destroys the healthy factor of the gravy mix) to create these little guys. Normally I would mix up some Bisquick and form my own biscuits, but I'm making a big dessert tonight and wanted to save my efforts.
    The gravy packet was pure easy, which is why I love the packet versus real gravy.
    Bring 1 1/2 cups water to a boil.
    Add gravy packet to 1/2 cup cold water and whisk until all the lumps are gone.
    Add mix concoction to the boiling water and remove from heat. It will thicken immediately. Serve immediately over Biscuits because there is no good way to keep the gravy warm without getting lumpy. :)

    Make biscuits according to package directions...this part is really easy too. I love that the only clean up is throwing the package away.

    Now you can't have biscuits and gravy without sausage and eggs...uhm, did I say this was healthy? HAHA...HAHA.

    This post is really called, 'Look what I made my Sweetie for breakfast'. It is a tiny bit healthier than if I had used the fat from the sausage to make the gravy, but not really...and my Sweetie LOVED it! O.K., so I can't help sharing all my yummy meals with my blogging friends. I have to take pictures of everything I eat these days. LOL!

    Sunday, September 28, 2008

    MANCAKES!

    I wasn't planning on using our breakfast for a post, but when Alex coined them as 'MANCAKES' I had to share.

    He calls them 'MANCAKES' because they were so huge! He makes me laugh!

    Monday, September 15, 2008

    Ebleskiver fun!

    A while back Williams Sonoma started carrying the ebleskiver pans. I had never seen them before and was fascinated. They are pans that have 9 indentations you fill with pancake mix. You can fill the 'pancakes' with jelly, cream or whatever your heart desires.

    I was worried when I bought the pan because I was certain I was going to destroy the little guys making the batter fly all over the place. But I DIDN'T! WHOOHOO!!!! Fortunately I bought my sister this pan last Christmas and I was able to learn from her experiences. The pictures at Williams Sonoma show wooden sticks used to flip the 'pancake', but they don't come with the pan. I didn't want to run to the store and buy skewers so we used wooden chopsticks. They worked famously!

    I bought the pan as a gift set that included pumpkin pancake/waffle mix with pumpkin pecan butter. We tried this pan out Saturday at our dinner party. HELLO FUN! I'm not kidding you. This pan is going to keep me entertained for many Sunday's to come!

    This is how it works. We mixed up the pancake mix, pour a little less than a tablespoon in a well greased (with pam) ebleskiver pan.If you put the whole tablespoon the instructions tell you to, it doesn't give you enough room to put the pumpkin pecan butter in the center for yummy goodness. Put one teaspoon of the pumpkin pecan butter in the center and cover with another 1/2 tablespoon of pancake batter. When the 'pancake' is bubbling at the edges like a real pancake, flip it with the chop sticks. Cook until the bottom is nicely browned.

    Alex and I had these as left overs for Sunday morning breakfast. I put a little bit of syrup on them and the were PERFECTION!!!