Showing posts with label Bread. Show all posts

Friday, April 5, 2013

Raspberry Oat Muffins

While shopping in Alexandria I found a fun cook book for my sister-in-law's birthday, Pretty Delicious by Candice Kumai. I liked it so much I bought a copy for me too!  The book claims to have 'lean and lovely recipes for a healthy and happy new you.'  Judging by this one recipe, I am pretty impressed.


Raspberry Oat Muffins:
1 1/2 cups all-purpose flour
1 cup quick oats - I used regular oats
3/4 cup brown sugar
2 teaspoons ground cinnamon
1 teaspoon baking powder
1/2 teaspoon baking soda
Pinch of sea salt
2 large eggs
3/4 cup unsweetened applesauce
2 tablespoons honey
1 cup frozen raspberries

Preheat oven to 400 degree's F. Line a 12-cup muffin tine with paper liners.

Whisk the flour, oats, brown sugar, cinnamon, baking powder, baking soda, and salt together in a large bowl.  Whisk the eggs, applesauce, and honey together in a medium bowl.  Stir the applesauce mixture into the flour mixture until completely incorporated.  Gently fold in the frozen raspberries.

Using a 1 1/2 oz. ice cream scoop, portion the batter into the paper cups, filling each about 3/4 full.  Bake, rotating midway though cooking, until golden brown, the center of the muffin resists light pressure, and a toothpick inserted into the center comes out clean, about 20 minutes.

Let cool for 20 minutes...because the raspberries come out SCREAMING HOT!!!!...then transfer to a wire rack to cool completely.

I tend to be suspect of 'healthy' recipes because they say they are yummy, but then taste like card board. Not so with this recipe.  I was pleased to see the amount of sweetening agents in this recipe, because even though it eliminates oil, it doesn't scrimp on flavor.  I am totally going to use blueberries the next time I make this recipe!!!

Monday, July 23, 2012

Ciabatta Bread!

Alex got me a Pannini cook book for my birthday last year that has some SWEET recipes for BREAD.  Not  recipes for sweet bread, but SWEET recipes for BREAD!  I don't generally have much luck with bread.  I can make it, it is good enough to eat, but it isn't beautiful and fluffy and light.  People have always told me my yeast must be old, I'm kneading it too much or its because I'm at altitude.  Well, I have used fresh yeast and I try not to have a relationship with my bread in the making stages and I still end up with dense bread.  I'm not complaining, I am totally down with dense bread...it would just be cool to be able to produce Wonder Bread like bread from time-to-time.

Well, this bread was no exception.  It turned out rather dense as well...again, not complaints...just dense.  I was going to make pannini's with this bread, but it turned out as PERFECT bread for hamburger buns!


Cibatta Rolls (from Panini from the publishers of Fine Cooking):
3/4 cup plus 1 tablespoon tepid water (70 to 78 degrees)
1 teaspoon instant yeast
1 1/2 cups plus 2 tablespoons unbleached all purpose flour
3/4 teaspoon kosher salt
3/4 teaspoon granulated sugar
2 1/2 tablespoons olive oil, plus more for oiling the pan and brushing the rolls

Pour the water into the bowl of a stand mixer fitted with a dough hook.  Add the yeast, flour, salt, sugar, and olive oil and stir with a rubber spatula just long enough to blend into a dough.  With a dough hook, mix the dough on low speed (2 on a KitchenAid mixer) for 3 minutes.  Turn the speed to medium high (8 on a KitchenAid mixer) and knead until it clears the sides of the bowl and collects on the hook, becoming smooth and elastic, about 8 minutes more.  at this speed, the mixer will "walk," possibly off the counter, so do not leave unattended.  

Oil a 7x11- inch baking dish.  Scrape the dough into the dish and pat with coiled fingertips to flatten it.  Let it rest and relax for 5 minutes, then use lightly oiled fingertips to push and stretch it across the bottom of the dish. Cover with plastic wrap and let the dough rise in a warm, draft-free spot until it has more than doubled in volume and reaches the top of the pan, about 2 hours.

Lightly oil a large baking sheet.  Uncover the dough and place the baking sheet, right side down, on top of the dough.  Invert the dish on to the baking sheet and sake once or twice to release the dough onto the sheet.  

Use a sharp chef's knife to cut the dough into 6 squares, and use the edge of the knife to push the squares 3 inches apart on the baking sheet.  Put 4 short drinking glasses near the corners of the pan and drape a sheet or two of plastic wrap over them so that ti covers the dough pieces and keeps them moist but does not touch them.  Let the dough pieces stand until they have expanded by about 50 percent, about 40 minutes.  

Preheat the oven to 475 degrees.  Remove the plastic and glasses and bake the rolls until dark golden brown, about 20 minutes.  Brush the hot rolls with olive oil.  Let cool completely on the baking sheet before slicing with a sharp serrated knife. 


Sunday, July 22, 2012

Gluten Free Strawberry Pancakes...The Best Yet!

It is a Sunday morning tradition to make a yummy breakfast at our house.  We are getting ready to move and have been trying to clean out our freezer and pantry of food so we don't have to get rid of it so we made Gluten Free Strawberry Pancakes!!!

Alex is a pancakes eating MONSTER, but always feels a little barfy after eating his weight in pancakes so we decided to try out Bob's Gluten Free Flour when making our Sunday morning treat.  I am not a fan of complicated meals, so the recipes for gluten free pancakes that include xanthum gum and almond flour are lost on me.  Bob's is a PERFECT substitute for flour.  The only draw back is that gluten free products have a tendency for an AFTER TASTE.  I can't even describe what that taste is...it is just...something.  So when I make gluten free pancakes, I always make sure they are flavored in some way.

Gluten Free Strawberry Pancakes:
1 3/4 cups buttermilk
2 cups Bob's Gluten Free Flour
4 tablespoons sugar
1 teaspoons baking powder
2 teaspoon baking powered
1 teaspoon baking soda
1 teaspoon salt
2 eggs
2 tablespoons olive oil
1/2 teaspoon almond extract
1 cup strawberries, chopped

Mix all the ingredients together and cook on griddle over medium heat.


The addition of the almond extract brings out the sweetness in the strawberries.  Alex actually told me this recipe was the BEST gluten free pancake recipe YET!   YEAH!!!   

Thursday, January 26, 2012

I LOVE THIS BREAD!!!


I have made this bread multiple times and am in LOVE with baking my own bread.  I have to admit I DO have issues with it coming out with a puffy top, but I suspect it has something to do with being at altitude here in Colorado Springs.  I have used additional gluten, which is supposed to help combat the 'puffy' issue, but it didn't help much.  This bread is a PERFECT dense, whole wheat bread!  I make three loaves at once and freeze them.  Once defrosted I slice as needed and put in the toaster to give it that fresh out of the oven taste!


Simple Whole Wheat Bread: 

  • 3 cups warm water (110 degrees F/45 degrees C)
  • 2 (.25 ounce) packages active dry yeast
  • 1/3 cup honey
  • 5 cups bread flour
  • 3 tablespoons butter, melted
  • 1/3 cup honey
  • 1 tablespoon salt
  • 3 1/2 cups whole wheat flour
  • 2 tablespoons butter, melted

  • In a large bowl, mix warm water, yeast, and 1/3 cup honey. Add 5 cups white bread flour, and stir to combine. Let set for 30 minutes, or until big and bubbly.

  • Mix in 3 tablespoons melted butter, 1/3 cup honey, and salt. Stir in 2 cups whole wheat flour. Flour a flat surface and knead with whole wheat flour until not real sticky - just pulling away from the counter, but still sticky to touch. This may take an additional 2 to 4 cups of whole wheat flour. Place in a greased bowl, turning once to coat the surface of the dough. Cover with a dishtowel. Let rise in a warm place until doubled.

  • Punch down, and divide into 3 loaves. Place in greased 9 x 5 inch loaf pans, and allow to rise until dough has topped the pans by one inch.


Bake at 350 degrees F (175 degrees C) for 25 to 30 minutes; do not overbake. Lightly brush the tops of loaves with 2 tablespoons melted butter or margarine when done to prevent crust from getting hard. Cool completely.


Sunday, September 18, 2011

'Tis the season for PUMPKIN!

My favorite thing about fall?  PUMPKINS!  I was dismayed to find that none of the grocery stores had pumpkin stocked when I searched it out.  I searched high and low and ended up finding it at Sunflower Market.  I plan to buy a case of it when the regular grocery stores start carrying it.

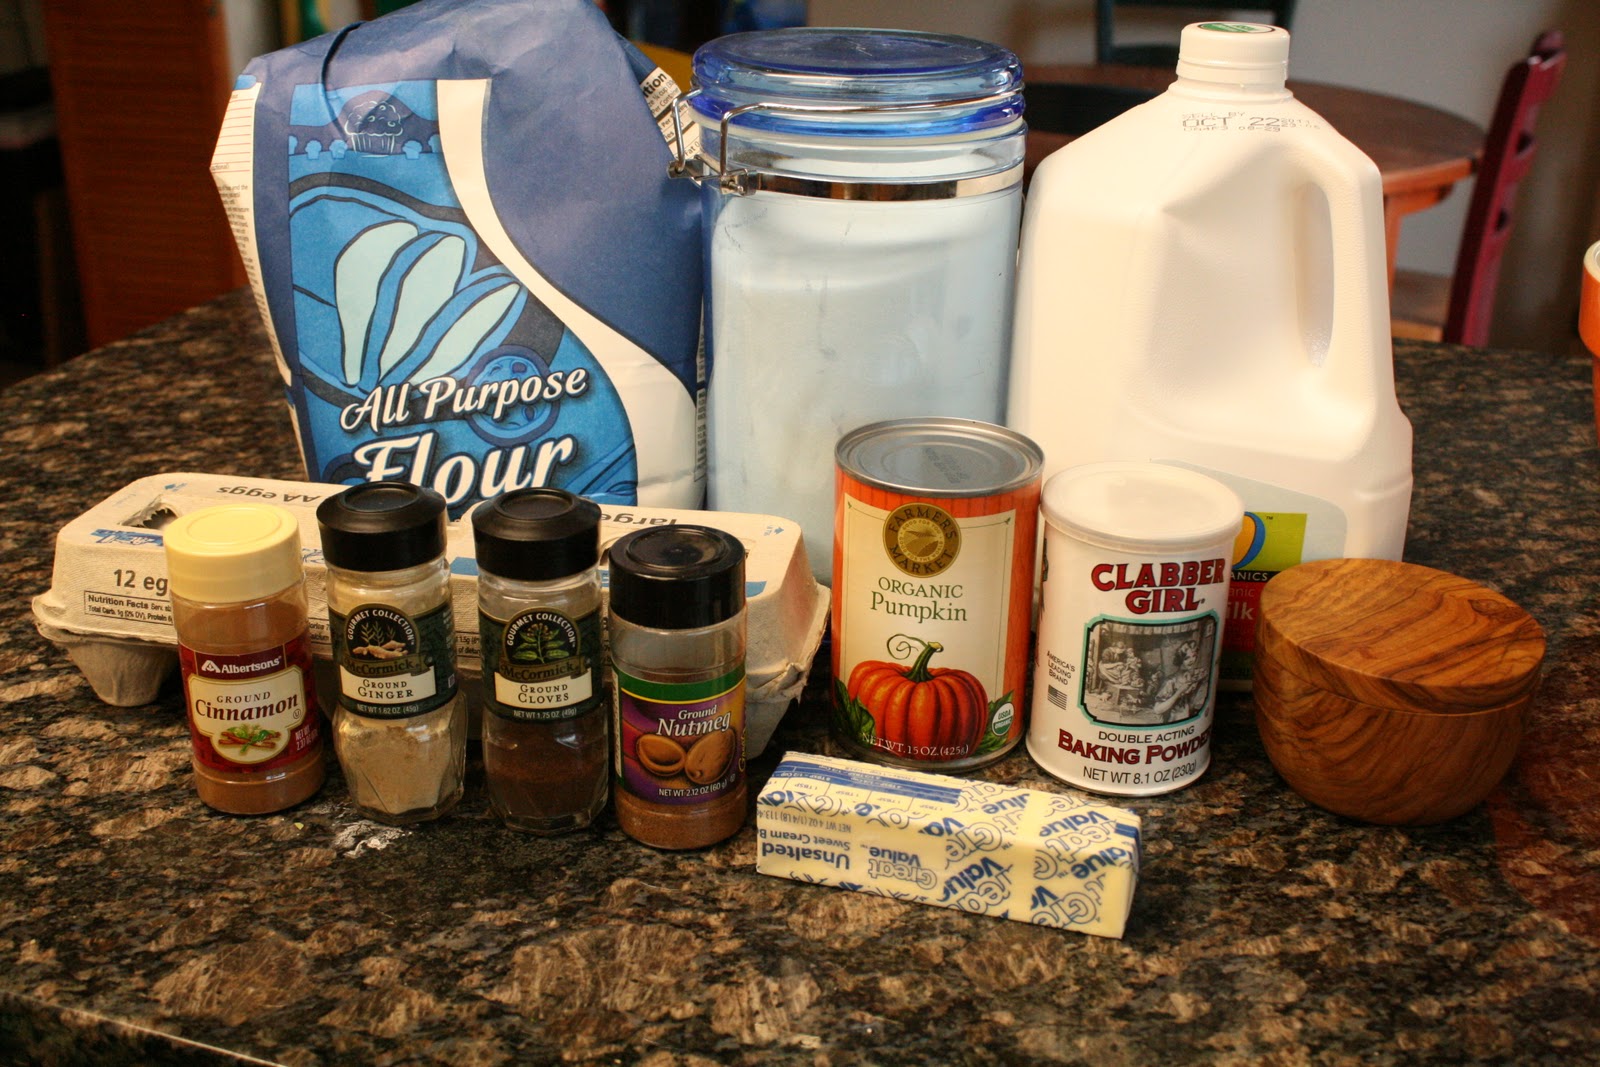
I've recently become addicted to Pinterest.  I originally thought it was just a crafting web site, but no, like an outfit...pin it...like a recipe...pin it!  Then you can scroll through all the 'pins' other people have found and you can pin it on your wall.  I have been pinning recipes like nobody's business!  I am especially glad I found the following recipe.  It is supposed to be a knock off of the Starbucks Pumpkin Scones, but I think they're better!  I am always disgusted that the food at Starbucks isn't made fresh in their individual stores.  Everything is day old...or more!  These babies are FRESH!  Warm from the oven scones beat hard crumbly ones ANY DAY!...especially if they are pumpkin!  :)

Starbucks Pumpkin Scones Knock Off Recipe:

Starbucks Pumpkin Scones Ingredients :
  • 2 cups all-purpose flour

  • 7 tablespoons sugar

  • 1 tablespoon baking powder

  • 1/2 teaspoon salt

  • 1/2 teaspoon ground cinnamon

  • 1/2 teaspoon ground nutmeg

  • 1/4 teaspoon ground cloves

  • 1/4 teaspoon ground ginger

  • 6 tablespoons cold butter

  • 1/2 cup canned pumpkin

  • 3 tablespoons half-and-half

  • 1 large egg

  • 1 cup powdered sugar

  • 1 tablespoon powdered sugar

  • 2 tablespoons whole milk

  • 1 cup powdered sugar

  • 3 tablespoons powdered sugar

  • 2 tablespoons whole milk

  • 1/4 teaspoon ground cinnamon

  • 1/8 teaspoon ground nutmeg

  • 1 pinch ginger

  • 1 pinch ground cloves


  • Preheat oven to 425 degrees
     F. Lightly oil a baking sheet or line with parchment paper.


    Combine flour, sugar, baking powder, salt, and spices in a large bowl. Using a pastry knife, fork, or food processor, cut butter into the dry ingredients until mixture is crumbly and no chunks of butter are obvious. Set aside.In a separate bowl, whisk together pumpkin, half and half, and egg. Fold wet ingredients into dry ingredients. Form the dough into a ball.  


    Pat out dough onto a lightly floured surface and form it into a 1-inch thick rectangle (about 9 inches long and 3 inches wide). Use a large knife or a pizza cutter to slice the dough twice through the width, making three equal portions. Cut those three slices diagonally so that you have 6 triangular slices of dough. Place on prepared baking sheet. Bake for 14–16 minutes. Scones should begin to turn light brown. Place on wire rack to cool.

    To make the plain glaze:
    1. Mix the powdered sugar and 2 tbsp milk together until smooth.
    2. When scones are cool, use a brush to paint plain glaze over the top of each scone.
    To make the spiced icing
    Combine the ingredient for the spiced icing together. Drizzle this thicker icing over each scone and allow the icing to dry before serving (at least 1 hour). A squirt bottle works great for this, or you can drizzle with a whisk.

    I'm not sure why people who create these recipes call for SO MUCH glaze!  Let alone TWO glazes!  I didn't bother with the plain glaze and halved the spiced glaze.  I have more than enough for the scones.  The glaze really IS the frosting on this recipe!  It was SO tasty and spicy!!!  If I ever get around to making pumpkin donuts, I'm going to use this glaze on them too!!!


    Monday, August 8, 2011

    Strawberry Muffins

    I am a touch crazy when it comes to muffins.  I am constantly searching out new recipes for a muffin to dream about, crave and DEVOUR!  This recipe is pretty damn PERFECT!  The consistency of these muffins was not too dense, not too fluffy and got better as they cooled down.  The best part? They weren't flat!  They actually raised to have nice puffy tops at altitude. 

    I have not made strawberry muffins before, but had some strawberries I needed to use up.  The recipe also claims you can use defrosted strawberries cut up too.  I know what I am doing with my Costco sized bag of frozen strawberries!!!  I have seriously been craving these babies since I made them.  The recipes makes 8-9 muffins, which I LOVE because it keeps me from eating too many!  Several people on Allrecipes.com suggested making a glaze for the top of the muffins so I tried it out (1/2 cup powdered sugar with 1/2 tsp vanilla).  HEAVEN!!!!!!  I suspect I'll be craving these babies the next time I'm pregnant!

    Strawberry Muffins
    1/4 cup canola oil
    1/2 cup milk
    1 egg
    1/2 teaspoon salt
    2 teaspoons baking powder
    1/2 cup white sugar
    1 3/4 cups all-purpose flour1 cup chopped strawberries

    Preheat oven to 375 degrees F (190 degrees C) oil an 8 cup muffin tin, or use paper liners. 

    In a small bowl, combine oil, milk, and egg. Beat lightly. In a large bowl, mix flour, salt, baking powder and sugar. Toss in chopped strawberries and stir to coat with flour. Pour in milk mixture and stir together.

    Fill muffin cups. Bake at 375 degrees F (190 degrees C) for 25 minutes, or until the tops bounce back from the touch. Cool 10 minutes and remove from pans.

    Thursday, July 21, 2011

    Ellie Krieger Pumpkin Muffins

    I am ALWAYS on the search for ways to use pumpkin, in part because I LOVE pumpkin and also because it is a good way to sneak in vegetables into my daughter's food without her knowing. :)  Ellie Krieger, Food Network Celebrity Chef, is all about making yummy comfort dishes healthy and flavorful and I am GLAD for it!  Because if it is healthy, it means I can eat more of them.  I actually made these muffins in a mini-muffin pan so I could freeze them for later gorging.  It actually paid off...except for when I defrost the zip-lock bag full of mini muffins.  I have managed to eat the entire bag each time. 

    These muffins are chalked full of spice and flavor, which is why I LOVE them...I don't just love them, I'm addicted to them.  I've even used the measurements from the spices for these muffins to make pumpkin pancakes.  LAAAAAAAA!!!!!!  Those are the angels singing. 

    Ellie Krieger Pumpkin Muffin Recipe:
    1 cup all-purpose flour
    1 cup whole-grain pastry flour
    1 teaspoon baking soda
    1/2 teaspoon salt
    1 teaspoon ground cinnamon
    1/2 teaspoon ground ginger
    1/4 teaspoon ground cloves
    1/8 teaspoon ground nutmeg
    3/4 cup packed dark brown sugar
    3 tablespoons unsulphered molasses
    1/4 cup canola oil
    2 large eggs
    1 cup canned pumpkin
    1 teaspoon vanilla extract
    3/4 cup lowfat buttermilk
    1/4 cup raw, unsalted pumpkin seeds

    Preheat oven to 400 degrees F. Coat a 12-cup muffin pan with cooking spray.

    In a medium bowl, whisk together the all-purpose and whole-wheat flours, baking soda, salt, cinnamon, ginger, cloves, and nutmeg.

    In a large bowl, whisk the sugar, molasses, oil and 1 egg until combined. Add the other egg and whisk well. Whisk in the pumpkin and vanilla. Whisk in the flour mixture in 2 batches, alternating with the buttermilk. Whisk just until combined.

    Pour the batter into the prepared muffin pan and sprinkle with the pumpkin seeds. Tap the pan on the counter a few times to remove any air bubbles. Bake for 20 minutes or until a wooden pick inserted in center of 1 of the muffins comes out clean.

    Let cool on a wire rack for 15 minutes. Run a knife around the muffins to loosen them and unmold. Cool completely on the rack.

    Corn Bread Heaven!!!

    Alex came home with leftover smoked BBQ beef brisket from a work party last week.  What goes with BBQ'd beef brisket? Besides coleslaw and baked beans?  CORN BREAD!!!!  I have tried several recipes and find most of them quite bland, especially the one on the Quaker corn bread package.  BLECH!  I'm not totally sure what steered me to the following recipe, but I am GLAD I tried it out.  I don't think I will make another corn bread...EVER!

    Reader beware...this recipe actually calls for mayonnaise.  I was pretty squeamish about it too, but I put my faith in the good folks of Tennessee that they wouldn't steer me wrong when it comes to corn bread.  And they didn't.  I HIGHLY suggest using a heavy dutch over skillet for this recipe.  Put some canola oil in the bottom of the pan and I PROMISE you won't be disappointed!!!!  I didn't have buttermilk when I made this recipe so I used regular milk and added a Tablespoon of lemon juice to curdle the milk.  


    You know what is the BEST part about this recipe?  It's gluten free!!!

    West Tennessee Corn Bread:
    1 egg
    1/4 mayonnaise
    1/4 cup buttermilk
    1 tablespoon vegetable oil
    1 cup yellow cornmeal
    1/4 cup sugar
    1 1/2 teaspoons baking powder
    1/2 teaspoon salt  

    In a mixing bowl, beat the egg, mayonnaise, buttermilk and oil until smooth. Combine the cornmeal, sugar, baking powder and salt; add to egg mixture and beat just until combined. Grease an ovenproof 6-in. skillet or round baking dish; dust with cornmeal. Add batter. Bake at 425 degrees F for 18-20 minutes or until a toothpick inserted near the center comes out clean. 

    Sunday, January 24, 2010

    Muffins to start the year off with!


    As Alex and I were planning our wedding I was your typical bride, buying up every wedding magazine known to woman.  I could look at wedding dresses ALL DAY LONG and many times I did.  Through all the magazine whoring I did, I found a FABULOUS magazine called Modern Bride Beauty & Fitness.  It has all the requisite make up and hair stuff, workout tips, but more importantly, it had a food section! 


    I LOVE muffins.  Blueberry muffins were the only thing I craved while I was pregnant.  Sadly, I had misplaced this magazine and couldn't make my FAVORITE muffins.  But one of the benefits of moving is that displaced items have a way of becoming placed again.  :)  I should mention, when I was pregnant I didn't just crave blueberry muffins.  I craved blueberry muffins with streusel on top.  But those muffins will give you a muffin top!  These babies only have 162 calories each!  Well, maybe a little more because it doesn't take into consideration the frozen blueberries I add...but their fruit, they can't be that bad.

    Granola-Streusel Muffins
    1 cup unbleached all purpose-flour
    3/4 cup whole-wheat flour
    2 tablespoons sugar
    1 tablespoon baking powder
    1/2 teaspoon salt
    1 cup reduced-fat (2%) milk
    1 egg, beaten
    2 tablespoons canola oil
    2 tablespoons all-natural chunky applesauce


    Streausel Topping
    3 tablespoons canola oil
    2 tablespoons flour
    2 tablespoons brown sugar
    2 tablespooons instant oils


    Preheat oven to 375 degrees.  Coat a 12 cup muffin tin with cooking spray.   In a large mixing bowl, sift together first 5 ingredients.  make a well in the center and pour in next 4 ingredients.  fold ingredients together just until combined; don't overmix or the muffins will be dense.  Evenly divide batter among muffing cups.  For topping:  In a small bowl, whisk together oil, flour and sugar until smooth.  Drizzle on muffins then sprinkle with oats.  Bake 20 to 25 minutes, or until a toothpick comes out clean. 

    Again, I added frozen blueberries to these muffins for the added fruit bonus.  I also added an extra tablespoon of flour to the struesel topping because I don't like it all runny.  You're going to DIG these muffins!  Naturally, I LOVE these muffins so much, I ate them before I realized I didn't get a picture of the finished product...that happens a lot around here.

    Tuesday, September 22, 2009

    Scones

    Coming from Utah, I always thought scones were fried flat bread...that's what we call scones. I remember being at a coffee shop and seeing they had scones on their menu and being shocked silly when they brought me out this crumbly dry bread. What the...? Since then, I have come to really enjoy scones.

    I was searching out recipes for dinner this last week and got side tracked when I came across the following recipe for scones on Allrecipes.com.

    Grandma Johnson's Scones:
    1 cup sour cream
    1 teaspoon baking soda
    4 cups all-purpose flour
    1 cup white sugar
    2 teaspoons baking powder
    1/4 teaspoon cream of tartar
    1 teaspoon salt
    1 cup butter
    1 egg
    1 cup raisins (optional) - I used cranberries instead of raisins.
    I also added a teaspoon of vanilla on the urging of some of the reviews on Allrecipes.com

    In a small bowl, blend the sour cream and baking soda, and set aside.
    Preheat oven to 350 degrees F (175 degrees C). Lightly grease a large baking sheet.
    In a large bowl, mix the flour, sugar, baking powder, cream of tartar, and salt. Cut in the butter. Stir the sour cream mixture and egg into the flour mixture until just moistened.Mix in the raisins...or cranberries in my case.
    Turn dough out onto a lightly floured surface, and knead briefly. Roll or pat dough into a 3/4 inch thick round. Cut into 12 wedges, and place them 2 inches apart on the prepared baking sheet.
    Bake 12 to 15 minutes in the preheated oven, until golden brown on the bottom. If you read my blog often, you'll know there is always a little trauma in the making of yummy food. The trauma of this dish involved the binding of the scone batter. The reviews on Allrecipes.com mentioned the crumbly nature of these scones and gave some suggestions to change the texture. When it came time to turn the dough out and knead it, the trauma began. This dough was CRUM-BLY! I tried molding it together and cutting it, but the pieces just crumbled apart. Fortunately I own a handy-dandy scone pan that came to my rescue. I stuffed the scone batter into my pan and crossed my fingers. These babies came out PERFECT! They were so yummy and perfectly crumbly! You can add whatever flavors to this recipe you want...chocolate chips, orange rind, vanilla bean. This is a GREAT starter recipe. I will definitely be making this one again and again.

    Sunday, March 15, 2009

    Kolaches

    I was playing around online this weekend and saw a recipe for Kolaches. I was curious about them because I had seen a recipe for Kolaches in Rebecca Rather's, The Pastry Queen cook book The first comment on the blogger's site mentioned The Pastry Queen cook book and I took this to mean I HAD to make these babies for breakfast Saturday morning. So at 10pm Friday night I got started making the dough.

    When I told Alex I was making this recipe he told me it was a Polish recipe his family used to make when he was a kid. I told him the recipe said it was a Czech recipe so we agreed to call it an Eastern European recipe. It is fun to find family history in food!

    The original recipe says it yield 16 to 18 buns, but I have found these recipes make nearly double what the recipe says it does so I halved the recipe. I have included the full recipe...but I am warning you in advance!

    Kolaches:
    Dough:
    2 cups milk
    1 (1/4 ounce) package active dry yeast
    1/2 cup luke warm water (110 to 115 degrees F)
    1/2 cup (1 stick) unsalted butter
    2 large eggs
    1 1/4 cups sugar
    1 teaspoons salt
    8 1/2 cups all purpose flour
    Peach Filling:
    2 cups pitted, chopped peaches
    1 cup good quality peach jam - we used my spiced peach jam
    Streusel Topping:
    1/2 cup all purpose flour
    1/2 cup sugar
    3 tablespoons chilled unsalted butter, cut into small pieces
    To make the dough: Warm the milk in a medium saucepan set over medium heat until it begins to steam and form a skin; do not boil. cool for 10 to 15 minutes until it registers 110 to 115 degrees F on a candy thermometer. Dissolve the yeast in the luke warm water and let sit until foamy, about 5 minutes. Melt the butter. Let cool for 5 minutes.
    In a large bowl, whisk together the eggs, sugar, salt, and melted butter. Add the cooled milk and yeast mixture. Gradually add the flour to the batter, 2 cups at a time. User your hands or a wooden spoon to mix the flour with the wet ingredients. Keep adding the flour until it is completely incorporated and the dough begins to hold together. use a light touch; don't pound or overwork the dough or you'll get tough kolaches. The dough will be sticky, moist, and light.
    Lightly grease a large bowl with vegetable oil. Transfer the dough to the bowl, cover loosely with plastic wrap, and let it rise in a warm, draft free place until doubled in size, 1 or 2 hours (a dent should remain when the dough is touched lightly). Leaving the dough in the bowl, punch it down until it deflates. Cover the bowl with plastic wrap, and refrigerate for at least 4 hours or overnight.

    I am not a born baker and I am a VERY slow learner. See this picture. This is what my dough looked like the next morning. It didn't rise at all for me in the 1 1/2 I let it rise in a warm oven. I was worried I destroyed the recipe because I am not friendly with yeast...but the recipe is VERY forgiving. Thank goodness!!!

    For the peach filling: combine 2 cups pitted, chopped peaches with 1 cup good quality peach jam in a medium bowl.

    Grease a 12 by 17 inch baking sheet with butter or cooking spray. With lightly oiled fingertips, shape the dough into 2 1/2 inch-diameter balls, about the size of small limes. arrange the balls evenly on the baking pan.

    To fill the kolaches, user your thumb or finger to make a generous indentation in the middle of each dough ball. mount about 1 heaping teaspoonful of peach filling in the indentation. Cover the rolls with a clean tea towel and let the rolls rise in a warm, draft free place until almost doubled in size. About 1 hour. THIS is where the recipe was forgiving of me. I put the kolaches in a warm oven and the DID double in size.

    Preheat the oven to 375 degrees F.

    To make the streusel topping: user your hands or a food processor to mix the flour, sugar, and butter until crumbly. Scatter the topping over the kolaches just before baking.

    Bake the kolaches until lightly browned on top 25 to 30 minutesCook the Kolaches for 20 minutes before serving.

    Rebecca Rather includes several variations to this recipe at the end of the recipe. Once of those variations is for cheese-filled Kolaches. I used a combination of the cheese and peach filling for my Kolaches.

    For cheese-filled Kolaches: combine 1 14-ounce carton dry-curd cottage cheese (I used cream cheese) with 1/4 cup sugar, the grated zest of 1 lemon, 1 teaspoon vanilla extract, and 2 egg yolks.

    This recipe was pretty dang good. I liked it because it sounds pretty decadent, but it turned out to be a great combination of sweet and bread. Alex LOVED these babies!!!!

    Tuesday, October 21, 2008

    Spicy Corn Bread

    I have been craving corn bread for some time and decided tonight was the night. Continuing with the Mexican theme Alex and I started this week, I shook up the corn bread with some cheese, onions and jalapeno. WHOOHOOO!!!!!!

    This was the side dish to my ultimate, FANTASTIC, Mexican, main course. But the main course is a SECRET...until tomorrow. It is killing me not to tell you what our main course was tonight...but, I have to hold you in suspense! Your mouth should be watering now...In the meantime, you're going to have to settle with my spicy corn bread. :)
    The best part about this corn bread is it is easy as all get out to make even better! I followed the directions on the side of the Quaker Corn Meal box:

    1-1/4 cups all-purpose flour
    3/4 cup Quaker Corn Meal
    1/4 cup sugar
    2 teaspoons baking powder
    1/2 teaspoon salt (optional)
    1 cup skim milk
    1/4 cup vegetable oil
    2 egg whites or 1 egg beaten
    I and added 3/4 cup of cheddar cheese, half a jalapeno...which I later realized was a MONSTER sized serrano - HOLY SPICINESS!!!!- and three green onions chopped. Mix it all up and follow the directions on the side of the cornmeal box. Heat oven to 400 F. Grease 8 or 9 inch pan. Combine dry ingredients. Stir in milk, oil and egg, mixing just until dry ingredients are moistened. Pour batter into prepared pan. Bake 20-25 minutes or until light golden brown and wooden pick inserted comes out clean. Serve warm. 9 Servings.Now, note that the recipe on the side of the Quaker Corn Meal box says '9 Servings'. Now look at what Alex did before I could stop him. When I asked him why he cut it into such small pieces he said he likes them small because they taste yummier that way. I beg to differ...I think they taste better when they are HUGE Texas sized pieces...but I guess I will have to continue to crave a big bite into a BIG piece of corn bread.
    This was how he served them up on our plates. :)

    Sunday, August 17, 2008

    ZUCCHINI!!!!!!

    It is that time of year again. The time of year when gardens are bursting with Zucchini. I have selected two recipes I recently acquired to help you use up your garden zucchini. A classic to everyone, Zucchini Bread and a new, but odd sounding favorite, Zucchini Pancakes.

    I scored the Zucchini Pancake recipe from my sister-in-law, Anne, who got it from Cusine at home. I am not kidding you when I tell you that these little babies ROCK all over your kitchen to your plate! They are so flavorful. I have made these twice since getting the recipe and I have learned a lot in the process. The first time I made these they were PERFECT! The second time I made them I took them to dinner at a friends house and this is where the learning began...

    Zucchini's have an insane amount of water in them. All the watering you do to bring these babies into the world goes right into the zucchini...well, not all of it. :) As a result of all that water, you have to squeeze as much of it out of the zucchini to make sure the patty doesn't fall apart while you're cooking. Because I was taking this to a friends house to cook, I prepared as much as I could in advance. I made the semi-fatal error of adding the egg BEFORE I left my house. We didn't eat for over an hour after we arrived at our friends house and the freshly squeezed zucchini absorbed all the egg and then sweat out additional water. I waited to add the baking powder knowing the chemical reaction that would happen there, but I should have left the egg out too. They still tasted FABULOUS, but were much more wet than the first time I made them.

    Zucchini Pancakes:
    2 medium zucchini, grated (~5c)
    2 t kosher salt

    Stir Together:
    1/2 c flour
    1/3 cup Parmesan, grated
    1 egg
    1/4 c yellow onions, grated
    2 T chopped fresh basil
    1/2 t garlic, minced
    1/2 t baking powder
    1/2 t kosher salt
    1/4 t red pepper flakes
    Olive oil

    Combine zucchini and salt for 5 minutes, then rinse in cold water and spin in a salad spinner. Stir together zucchini and remaining ingredients (except oil). Heat 2T oil in a skillet over med-high. Drop zucchini mixture by 1/4-c measures, flatten, and fry in batches, about 2 minutes per side. Serve w/ marinara sauce.

    Recipe #2 Zucchini Bread
    There are so many different recipes for Zucchini Bread. The one part that is consistent in nearly all of the recipes is the amount of vegetable oil they require...ONE CUP!!! There are 124 calories in a TABLESPOON of canola oil! A tablespoon! Well, I had to fix that! Instead of using the full 1 cup of vegetable oil the recipe calls for, I substituted 1/2 cup of the oil with 1/2 cup apple sauce. To make this bread even more healthy, I went back to my vegan roots and used Ener-G egg replacer instead of real eggs. Egg replacer mimics the chemical reaction real eggs do in recipes. You seriously can not tell the difference!

    I replaced the walnuts the recipe calls for with chocolate chips...seriously, who actually likes walnuts in sweet deserts? Nuts in sweets should be banned! And they are in my kitchen!

    Zucchini Bread:
    3 cups all-purpose flour
    1 teaspoon salt
    1 teaspoon baking soda
    1 teaspoon baking powder
    3 teaspoons ground cinnamon
    3 eggs
    1 cup vegetable oil
    2 1/4 cups white sugar
    3 teaspoons vanilla extract
    2 cups grated zucchini
    1 cup chopped walnuts

    Grease and flour two 8 x 4 inch pans. Preheat oven to 325 degrees F (165 degrees C).

    Sift flour, salt, baking powder, soda, and cinnamon together in a bowl.

    Beat eggs, oil, vanilla, and sugar together in a large bowl. Add sifted ingredients to the creamed mixture, and beat well. Stir in zucchini and nuts until well combined. Pour batter into prepared pans.

    Bake for 40 to 60 minutes, or until tester inserted in the center comes out clean. Cool in pan on rack for 20 minutes. Remove bread from pan, and completely cool.

    I scored this recipe from Allrecipes.com, submitted by v monti. This recipe received 5 out of 5 stars by 1141 members! What do I give it? This bread is FABULOUS! I give it a 5! Despite replacing the oil with apple sauce and using the egg replacer, it turned out moist and yummy!!!!